OKA on AWS
OKA is available on AWS Marketplace through already packaged AMIs that contains OKA and its prerequisites. Different versions exist to fit various use cases: see UCit solutions in AWS Marketplace to select the edition that corresponds to your needs.
Recommended configuration
We have already pre-selected a set of instance types that can support OKA in AWS. You can safely select one from those when you wish to start an OKA instance. There are though a few parameters that you should take care of.
Instance size
The most important parameter for OKA to work properly is the amount of RAM of the instance.
We recommend to have at least 8GB of RAM for small workloads to analyze (up to 1M jobs). For larger workloads,
consider that OKA needs on top ~10GB of RAM per additional 1M jobs during the ingestion phase
(when OKA is parsing your input files). This can be reduced by splitting the input files into smaller input files
that can then be zipped all together in an archive (.zip or .tgz), and upload this archive to OKA to ingest the data.
A strategy to ensure correct ingestion of the data and reduce the cost is to use an bigger instance to ingest the files, then stop it
and scale it down to a smaller instance.
During operation, OKA can process a few millions of jobs with only ~16GB of RAM.
There is no need to have an instance with more that 64GB of RAM, as OKA will not make the best of it.
EBS type and size
Data are stored on the disk (EBS) by OKA:
During ingestion: the files are stored in a temporary directory, and then deleted once the ingestion is done.
After ingestion: the data are stored in Elasticsearch.
We recommend to use SSD disks on your instances, for example gp2 or gp3 EBS volumes.
The size of the volume must be sufficient to accommodate the OS, the temporary files and the data once ingested. A rule of thumb is to have 8GB for the OS and then at least 1GB of disk per millions of jobs, plus some space to upload your log files. A good start is around 50GB, and then increase the size of the EBS when you start to lack space.
Security group
OKA is accessed exclusively through HTTPS, but you might need also an SSH access for instance management. Here are the rules that you should have in your security group:
Inbound rules
Type:
HTTPS, Protocol:TCP, Port range:443, Source:A.B.C.D/xType:
SSH, Protocol:TCP, Port range:22, Source:A.B.C.D/x
Outbound rules
Type:
All traffic, Protocol:All, Port range:All, Destination:0.0.0.0/0
With A.B.C.D/x the IP range you wish to allow access from to OKA.
Usage instructions
Initial startup
The first time you launch an OKA AMI the system will prepare the environment, setup some passwords and certificates before OKA is available. So initial startup will take a few minutes, the following boots will be much faster.
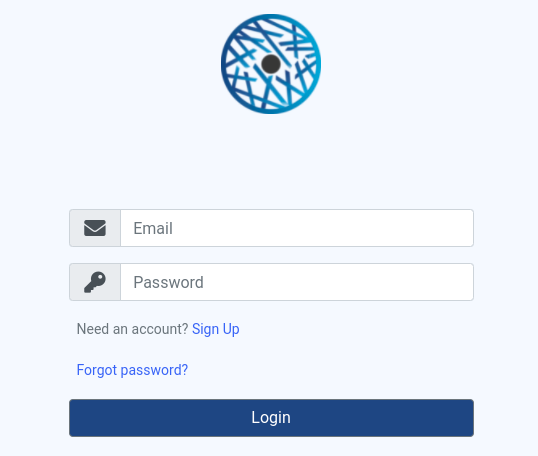
Accessing OKA
During first startup, OKA creates a user name: ec2-user@<instance ID>.com, with password <instance ID>.
To login, simply connect to the IP address (or DNS name) of your instance in your favorite browser:
By default OKA is served in HTTPS by an Nginx server that has self-signed certificates, so the browser will issue a warning saying that the site is unsafe:
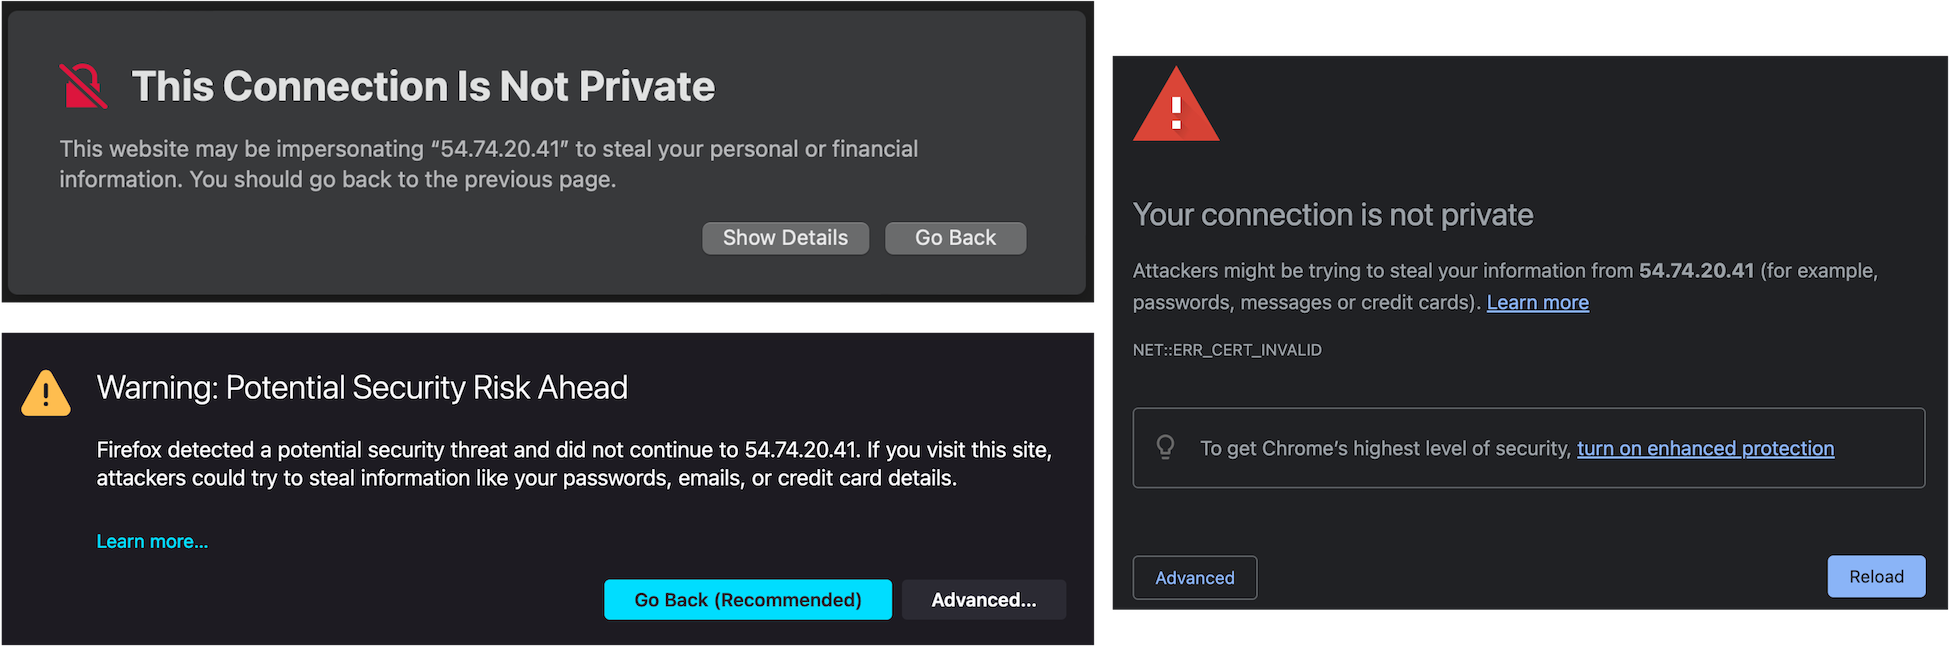
You can safely ignore the warning: a unique self-signed certificate is created the first time you start an OKA instance. Bypassing the warning depends on the browser, but usually, clicking on
Show detailsorAdvancedwill give you the option to bypass the warning and carry-on to OKA. For Chrome, you might need to disable certificate checking (not recommended), or you can type the following characters when the warning is displayed:thisisunsafe.If you wish to setup valid certificates, please see Change SSL certificates.
You can then log in OKA by providing the login and password:
You will then need to create a cluster and ingest some data. See Clusters management for more information.
If you need to access the instance through SSH, the username is ec2-user and use the key pair specified at launch time.
How to
Access this OKA documentation
The latest version of OKA documentation is available online at https://doc.oka.how.
The OKA AMI embeds its own version of the documentation, that is accessible through https://OKA_INSTANCE/doc/
(with OKA_INSTANCE the IP address or DNS name of the EC2 instance).
Update user password
If you are already connected and wish to update your password, simply go into your user profile and click on Change my Password.
If you have lost your password, then you will need to connect to the EC2 instance, and reset the password manually. See OKA administrator for more information.
Add a user
The process is similar to resetting your password: you will need to connect to the EC2 instance and follow the instructions presented here OKA administrator for more information.
Change SSL certificates
By default the OKA AMI generates self-signed certificates for Nginx. As explained above, these certificates are not recognized as valid from your browser. There are two ways to setup OKA with valid certificates:
Update Nginx certificates: you will need to provide your own valid certificates, and update the Nginx configuration located in
/etc/nginx/conf.d/oka.nginx_ssl.conf:server { [...] # SSL configuration ssl_certificate /etc/ssl/certs/nginx-selfsigned.crt; ssl_certificate_key /etc/ssl/private/nginx-selfsigned.key; ssl_dhparam /etc/ssl/certs/dhparam.pem; [...] }
Use an Application Load Balancer (ALB): As we are in AWS, we can leverage the services provided to setup a fully managed reverse proxy with valid certificates associated with it. Without going into the details here, the solution involves the following components:
A certificate in AWS Certificate Manager (ACM) associated with your domain (e.g.,
oka.mycompany.com). You will need to update your DNS records (add aCNAMErecord) to validate that the domain is yours.An AWS Application Load Balancer (ALB): that will act as a reverse proxy. You need to setup:
at least 1
HTTPSListener with a rule forwarding to a Target Group containing as target the OKA instance. Use the certificate declared in ACM (ProtocolHTTPS, Port443, Protocol versionHTTP1, Health checks target path/login/)optionally 1
HTTPListener with a rule forwarding all traffic to theHTTPSListener (https://#{host}:443/#{path}?#{query})