Filters
Date filter
For most of the plugins, you will be able to filter on a specific period using the date filter. A tooltip on hover of the filter shows you the date feature that will be filtered:
Jobs submit date for most of the plugins
The start date for the line item for CloudSHaper consumption reports
Dates associated to load values for Load and Meteo Cluster plugins
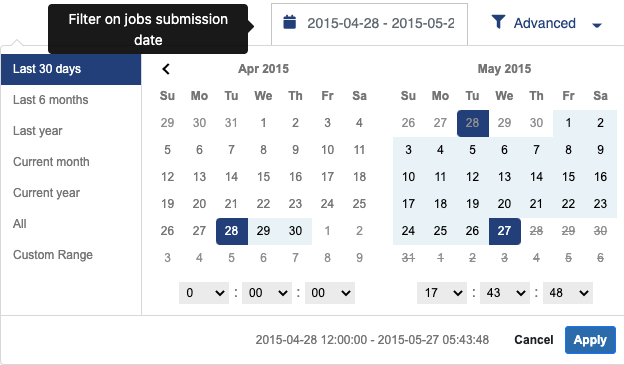
You can select a start and end date on which to filter the data displayed in the current plugin.
Use the Apply button to apply your changes.
These changes will be saved in session and reloaded upon reconnection on this plugin or on other plugins using the same data.
By default, only the last 30 days of data are displayed to avoid requesting too much data.
The left panel of the date filter allows you to request data for the last 30 days, 6 months, year or all your data.
These filters are period-related. A filter profile using Last 6 months will always display the last 6 months of data whatever the dates are.
Advanced filter
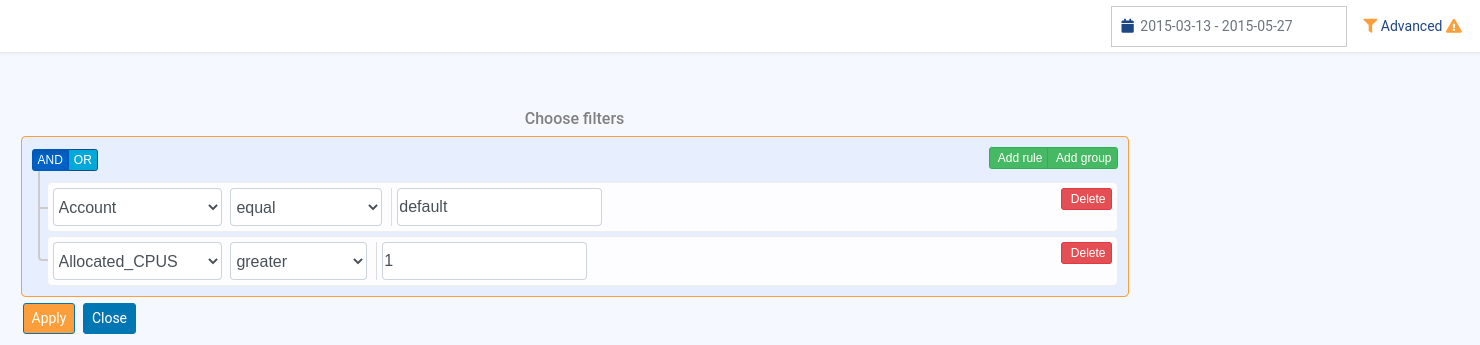
The advanced filter allows to create groups of rules to filter the data displayed in the current plugin. All fields saved in the database are available in the advanced filter. For example, in the State plugin, you will be able to filter the jobs with a specific account and more than 1 allocated CPU.
Depending on the plugin, the advanced filter will apply on different data:
Jobs accounting fields for most of the plugins
Cloud reports columns for CloudSHaper consumption plugin
Nodes features for Load occupancy plugin
Depending on the selected field, different operators are available:
For
Stringfields:equal: filter on field value equals some string.not equal: filter on field value doesn’t equal some string.begins with: filter on field value begins with some string.doesn't begin with: filter on field value doesn’t begin with some string.ends with: filter on field value ends with some string.doesn't end with: filter on field value doesn’t end with some string.in: filter on field value in the provided strings list (comma-separated values).
not in: filter on field value not in the provided strings list.is empty: filter on an empty field.is not empty: filter on a not empty field.string_contains: filter on field value contains some string.
Note
This operator supports regular expressions (regex) to search for a pattern in the selected string field.
string_not_contains: filter on field value doesn’t contain some string.list_contains: filter on field values contain one or more strings. This operator is specific to list field (e.g.NodeList,Partitionfor occupancy plugin).
Note
This operator is non-exclusive. It will search for the documents having at least one of the provided strings in the list field. This field may contain other values in addition to the one you are searching. Use
equaloperator to filter on field values that equal exclusively to one or more strings. Usestring_containsoperator to filter on field values that contain all the provided strings (but not exclusively).list_not_contains: filter on field values don’t contain one or more strings. This operator is specific to list field (e.g.NodeList,Partitionfor occupancy plugin).
For
Numericfields:equal: filter on field value equals some number.not equal: filter on field value doesn’t equal some number.less: filter on field value less than a number.less or equal: filter on field value less or equals to a number.greater: filter on field value greater than a number.greater or equal: filter on field value greater or equals to a number.between: filter on field value between two numbers (included).not between: filter on field value not between two numbers (excluded).
An automatic completion will suggest you some values for the string fields.
Use the Apply button to apply your changes.
These changes will be saved in session and reloaded upon reconnection on this plugin or on other plugins using the same data.
Save filters as profile
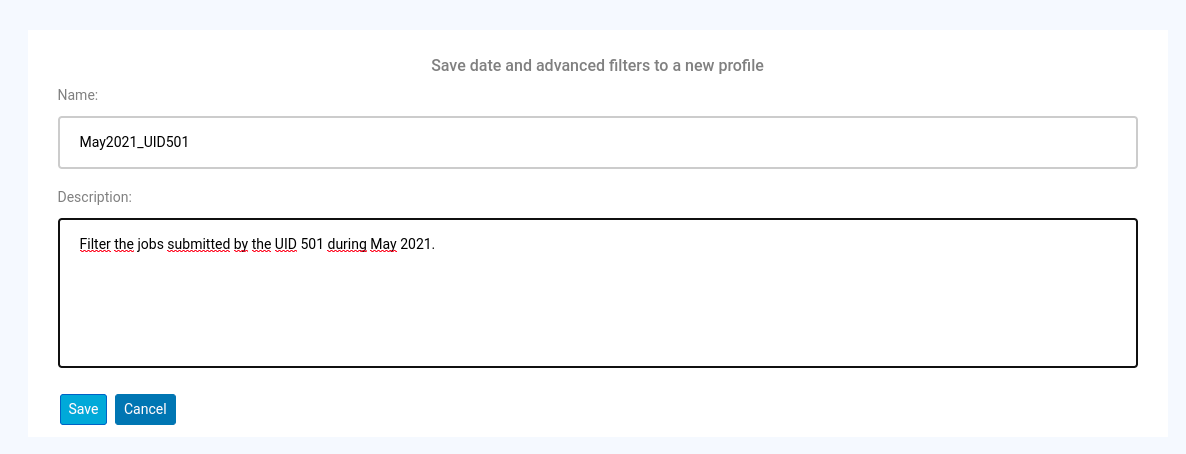
Date and advanced filters can be saved into a profile to be reused afterwards.
To create a new filters profile, first configure your date and advanced filters.
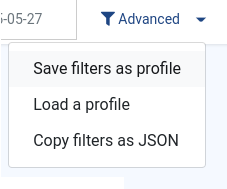
Then click on Save filters as profile, choose a filter name and fill in the description (optional).
You can select a filter profile by clicking on Load a profile.
When switching profile, do not forget to click on the Apply button to apply the selected profile.
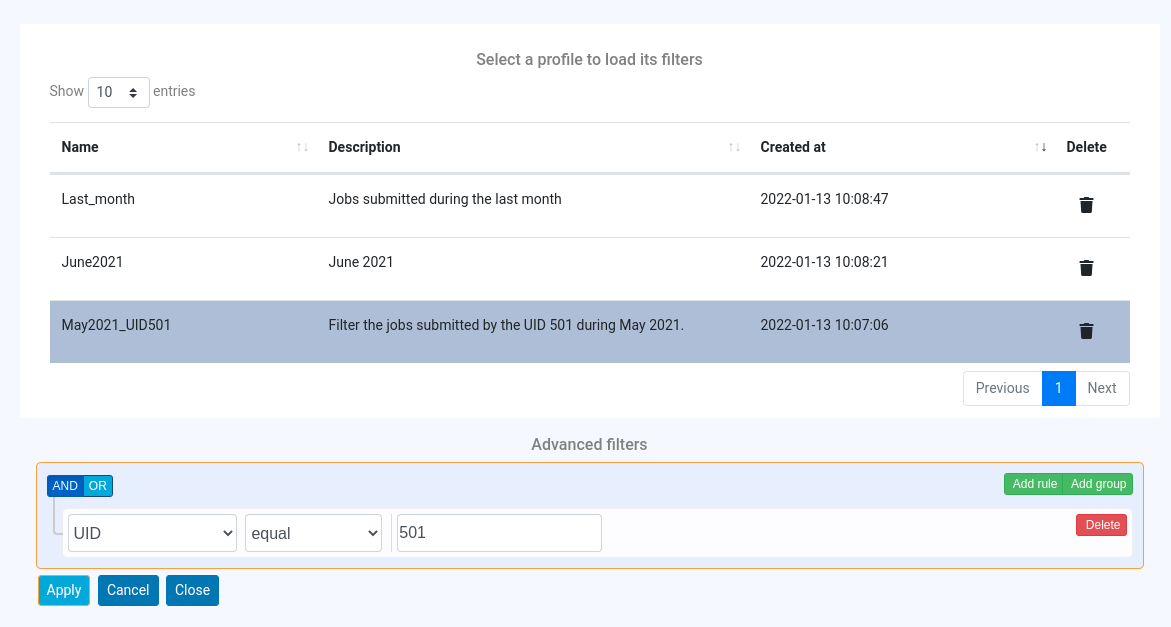
You can also delete a filter profile from this panel.